Well, every once in a while, knowing your way with post processing becomes a good skill to have under your belt.
Well, this was one of those cases where I put my graphic designer hat and save the day with some nice post processing. You see, as a graphic designer, one usually get a lot of bad pictures or maybe just pictures that don't match the exact look of what we are after. So, we are accustom to retouching our way into that specific look we want. Being also a photographer I'm always self-conscious of trying to take each picture right the first time around and not having to go over retouching every single shot, after all, it's not the same to fix just one, than say, four hundred.
There for I present my 1st commandment of the photo geek (and any wise photographer :P).
1. Thou shall always shoot in RAW.
Thanks to having a RAW file was able to get this shot the way I originally intended in just a few simple steps.
Step 1: Fix Exposure
First of I start fixing the exposure. One of the many advantages of shooting RAW is that even though and image look over or under expose it doesn't necessarily mean the photo doesn't have that information. As with this case. I was able to easily tweak my exposure within the basic parameters of the RAW file the get the atmosphere I wanted for my shot.
Step 2: Fix White Balance & Color
Now that I have a good exposure I need to fix the WB. Once again, RAW power. White Balance is one of the best things about RAW format.
Let me take a minute to better explain this. You see, when you shoot JPG one of two things happen, either you set some specific WB before hand, or the camera tries to determine it for you. In both cases, once the WB is set, the camera just uses it, and that JPG file is saved with that color information. On the other hand when you shoot RAW it's like if the camera saved all the posible WB settings into that one RAW file. So when you are post processing, you can tweak, or change altogether the WB, no matter how it was shot in the first place.
So, back to my image, I wanted to give the shot that same morning light look that my eyes where seeing at the moment of the shoot, but that the camera didn't get right.
So I do that by adjusting the WB manually in the RAW file, and just eyeballing it really, until it looks right. After that, the tone looks fine but the colors are still looking pretty monochromatic. So I bump the vibrance up a little to get better color variance in the whole scene.
Step 3: Final Touches. Cool it down a little for that morning light feel.
It has come a long way, but there's still some final touches to do.
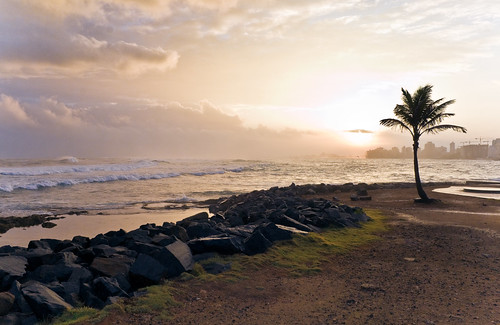
I really want to give it that morning light feel. In order to do that, I need to cool it down a little more in the shadows. Doing that will give it that distinct look of a sunrise ratter than a sunset. So for my final step I go over to the split toning section of the RAW parameters and bring in a little blue hue in the shadows and play with it until it looks right.
After that I take a minute to do some final tweaks that consist of a subtle fix in the crop and the vignette. And then, viola, the final image! Nice right?
So, lets recap really quick....
Original shot
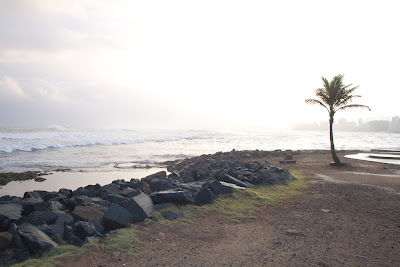
Step 1: Fix Exposure
Step 2: Fix White Balance & Color
Step 3: Final Touches. Cool it down a little for that morning light feel.
Remember to check below for the technical data for this picture, and for a more complete list of the RAW parameters used check the
EFIX data.
Share your story of rescuing lost photos and stay tune for the next update.


.jpg)
.jpg)